You don’t saw the neck off a 1952 Gibson Les Paul without fully considering WHY one might do such a thing. Lots of thought and care went into this repair and the outcome made it all worthwhile.
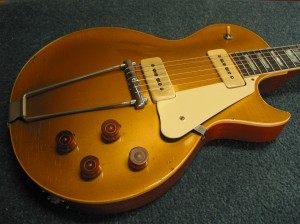
The 1952 Goldtop is where it all began for the Gibson Les Paul. Guitars from this first year of production have an obvious historical importance and, as with all vintage pieces, the conscientious repairman does not make an irreversible alteration to one without just cause. This one was sold to the current owner with full disclosure of some previous repairs to the headstock. Those repairs were well done, solid, and the guitar sounded amazing (vintage P90’s really are something special.) But they simply did not look right and that’s where we come in. It took heating, sawing, chiseling, filing, and painting to get there, but this is how we made this vintage classic look and perform the way it’s supposed to.
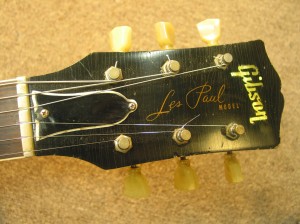
The beginning: It looks pretty good. There’s no arguing that. But what this guitar’s owner noticed is that this headstock just seemed a little … short. And sure enough, it was.
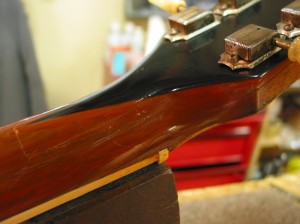
Here’s why. The headstock had clearly broken at some point – a common occurrence with Gibson necks. It’s usually a relatively simple repair consisting of gluing the pieces together and touching up the paint. But this repair looks strange – with a black “stinger” painted on the back. Why was that done? A closer look revealed that for some reason, the repairman who fixed this break decided to add several steps.
First, he took the broken end piece and the remaining neck section and smoothed out both surfaces- possibly on a belt sander. This is the step that shortened the headstock, as it removed some of the wood. We can see this already by looking at the break line (below the low E tuner) which is uncommonly straight. Usually this is a naturally jagged-looking fracture line. Next, he removed some of the back of the headstock and used a piece of maple to add strength to the repair. You can see where that piece terminates at the far left of the picture above – just below the black stinger. It’s hard to see here, but there are even drawn-in grain lines to make the brown part of the maple look like mahogany.
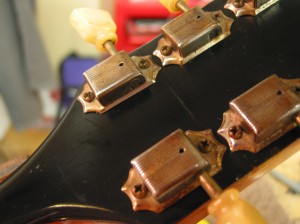
A line in the finish between the low and high E tuners shows where that maple piece ends.
So at this point, we’ve seen enough to make the decision. We’ll remove this very strong but unattractive repair and replace it with an entirely new headstock that will look more historically correct.
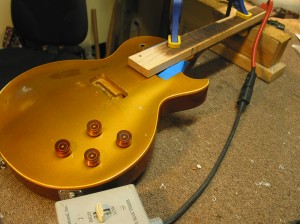
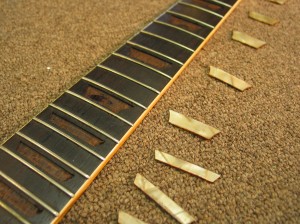
Step one, we heat the fretboard to soften the glue that joins it to the neck and gently remove the whole thing – carefully removing and preserving the original inlays beforehand.
We decided to take a closer look at what was underneath the paint on the old headstock and discovered that our theory was correct.
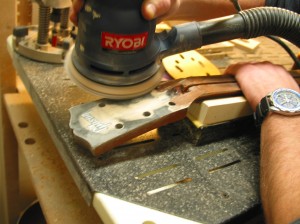
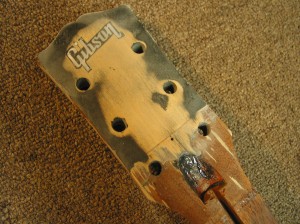
The above picture shows that straight cut between the low tuners. It also shows that the logo overlay – made of holly wood – was sanded away below that cut, probably to make the two surfaces line up smoothly.
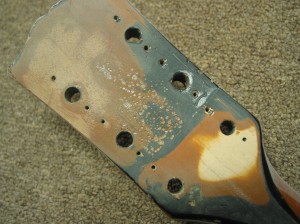
The back of the headstock reveals that maple support piece the whiter area – painted brown first and then over-sprayed with the black stinger.
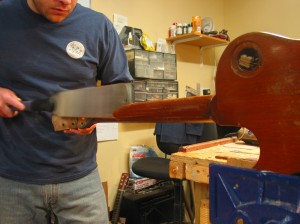
Next we stared at the neck for a few hours. Drew a few deep breaths. And sawed the neck off a 1952 Les Paul. Gulp!
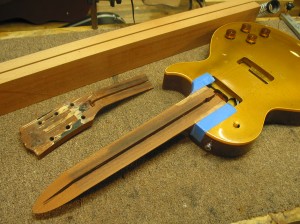
No turning back now. Time to make a new headstock. We begin by band-sawing a piece of mahogany to fit the angled cut. The direction of that angle is critical as we want the string tension to pull the repair closed. If we were to leave the fretboard on and saw the other direction, the string tension would be pulling the repair open – making it much less stable.
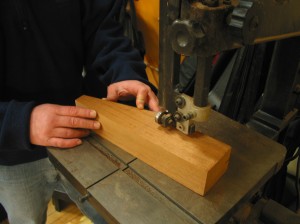
We were lucky to acquire an original Gibson holly headstock overlay complete with a period-correct inlaid logo. When it came time to cut it to size, we wanted to get all of the dimensions correct. So we went right to the source – Gibson Guitars. While the company did not keep complete records at the time with all the relevant measurements, one of the workers in the repair shop actually owns a very similar 1953 LP. He was kind enough to take the measurements himself and email us a tracing of his headstock. Huge thanks to Timothy and Phil at the Gibson repair shop for helping us get it just right!
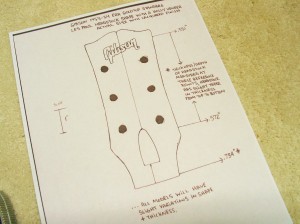


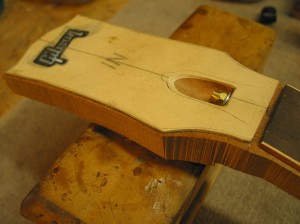
As luck would have it, and just when we needed it, a customer of ours brought in another 1952 gold top which we used to confirm all of our measurements. Always good to have more than one source for this sort of thing!
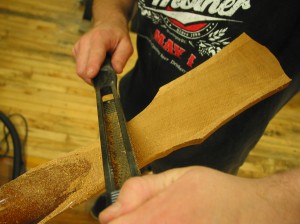
The Gibson headstock profile begins to take shape.
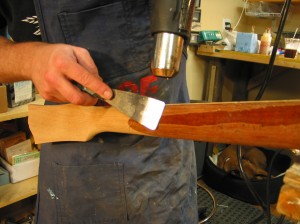
Once the neck looks and feels right, Dan strips the remaining finish from the neck. As much as we would like to preserve every bit of original finish, there just isn’t a way to finish the new section and blend it in with the old without refinishing the entire neck.
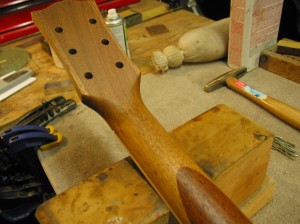
First comes dark brown pore-filler to make the grain jump out and more importantly, produce a level painting surface.
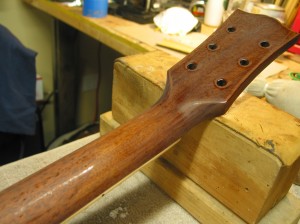
Next some brown stain matches the old and new portions of the neck.
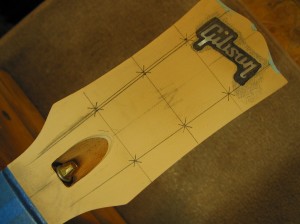
Then precise measurements are marked for tuner placement.
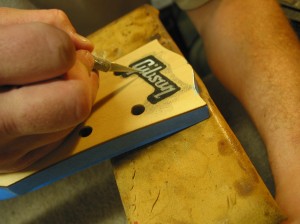
After drilling the holes for the tuners, we’re ready to paint the face of the headstock. Dan uses a clear adhesive to protect the inlaid Gibson logo from the black paint (hard to see, but that’s what he’s trimming here.) At this point, we’ve also re-glued the fretboard, replaced the inlays, and installed new frets.
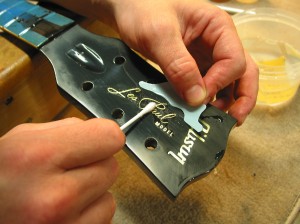
The final touch is applying the water-slide Les Paul logo and spraying a few more light coats of clear finish.
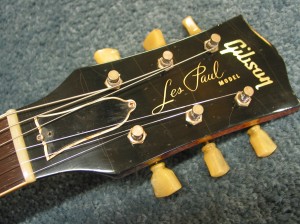
We made a new bone nut, used the original tuners and truss rod cover, and did some light distressing of the finish to blend the appearance in with the rest of the guitar.
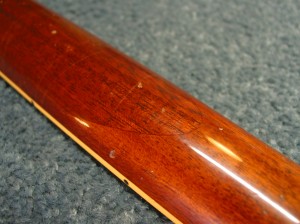
The new scarf joint is visible; we’re not trying to fool anyone here. But the color and finish match makes the seam look natural and, well.. seamless.
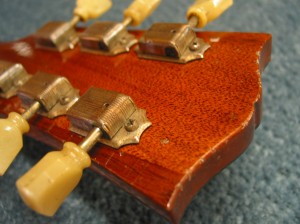
1952 Les Pauls did not come with a stamped or inked serial number so we left that area alone.
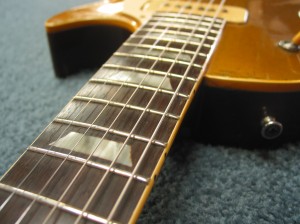
Here we are, strung up with new frets. One non-original part that makes a big impact with this guitar is the addition of a Joe Glaser-designed tailpiece end which fits easily onto the old trapeze. It sits lower and has an intonation ridge – solving the well-know problems of poor action and bad intonation that accompany 52’s. This guitar plays beautifully and the pickups just sound incredible.
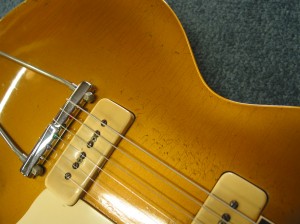
This was a lot of work for a rare and classic instrument. The end result was completely worth it however. We restored the original look while protecting as much of the original features as possible. It’s going to be making music for at least another 60 years!

This is my guitar; been playing it for over a week now…the repair is EXCELLENT, and the scarf joint is not noticeable unless you’re looking for it. These guys know their stuff!
On a Les Paul with a more common stop bar tailpiece and tune o matic bridge set up, what are the advantages or disadvantages to wrapping the strings around in the same way you have to on a bridge like this? Will it totally scratch up my tail piece?
Jonny, It’s been a while. Good to hear from you and best wishes from the CFW crowd.
Yes, it will scratch up your tailpiece to back-wrap the strings. So why do some people do it? The theory is that you’ll add some sustain if the tailpiece studs are lowered all the way down to the guitar top, and it seems to make sense that it would work. You back wrap it so the strings aren’t pulled downward at such a dramatic angle. Some folks swear by it, but I can’t honestly say that I’ve ever heard a “Wow!” difference. If you don’t mind some scratches in the tailpiece, give it a shot. You can always get another tailpiece if you don’t like it and are bothered by whatever scratches might appear. -Cheers!
While you were at it you could have pulled and reset the neck at the modern angle.
Paul,
We probably could have, yes. But then we’d need to come up with a different bridge setup. Do you put the original tailpiece back on (one that had no intonation compensation), or drill into the top to install a tunematic and stop tailpiece… The new tailpiece really does the trick and allows us to keep the guitar as original as possible. It happened to be the right way to go on this guitar, but yours is a good question. On a less historic piece we probably would have considered it.
What does a repair like this cost? I also have a 1952 Les Paul with a broken headstock.
Robert,
I’ll email you to run through some possibilities. -Steve
just want to say wow thats amazing . what kind of saw do you use to cut the scarf joint and at what angle is it cut ?
Dana,
Sorry to just see this comment. Thanks. That’s just a standard Japanese pull-saw. The angle is pretty much in line with what the headstock angle will be (which I think was 14 degrees at this era of Gibsons.) We’re not too concerned with the angle itself though because ultimately the new piece just has to fit properly, regardless of angle. That’s the important and difficult part – joining the two pieces together seamlessly.
Almost 4 years and STILL excellent playing. I’ve had a couple guys over to play it and they cannot believe how well it plays and the sound of those original pickups! Thanks for the fine work….although I think silk-screening the Les Paul signature would have been a BIT more authentic, the fact it’s here for all to see makes it ok.
I hope to attain this level of skill in my small repair world. Truly astounding work. Would argue, since its a 52 not a 55+ up, the value has increased after this repair. Kudos from TX