See how we improved another shop’s repair gone bad and learn how to prevent this damage to your own guitar.
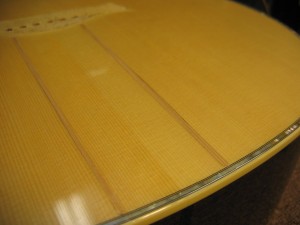
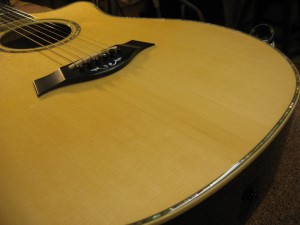
A beautiful Taylor 914CE acoustic guitar came to us with two top cracks that had opened up after being ‘repaired’ by another shop (that shall remain nameless.) The previous repairman made three errors in our estimation: first, he enlarged the cracks with a small router or Dremel tool – removing too much wood in the process; second, he spliced in sitka spruce patches that do not match the original Engelmann spruce top; and third – well he just didn’t do a very good job of either since the cracks opened up again. The owner paid more than $4000 for this guitar and he wasn’t pleased with the look of the previous repair or the fact that it held for less than a year. We made a decision to not just replace the 2 bad patches, but to replace the entire area between the cracks with a carefully chosen set of Engelmann. That turned out to make this repair less expensive to perform and gave us a much better outcome than just filling the cracks again.
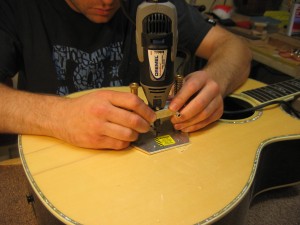
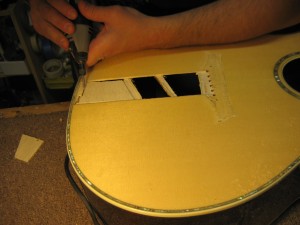
We started by removing the bridge and using a Dremel tool to clear away the original spruce material.
“Wait wait!” you say. Wasn’t the Dremel part of the problem with the old repair? It was. But we’re using it in a different way here. We don’t want to damage the delicate bracing below and by making very shallow sweeping cuts, the Dremel allows us to slowly shave the whole area down a little at a time until the pieces can be easily removed. Take a look:
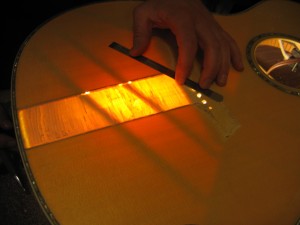
By dropping an inspection light into the guitar, we backlit the braces and traced them into the top to make sure we didn’t cut into them. Then we cut the rest of the way through the spruce until the pieces started coming out.
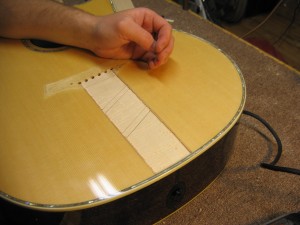
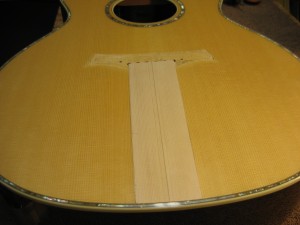
We then bookmatched our patch of Englemann spruce, taking care to match the width of the grainlines in the original top. Once it was joined properly, the edges of both the patch and the outer lines of the hole are precisely fit so there are no gaps.
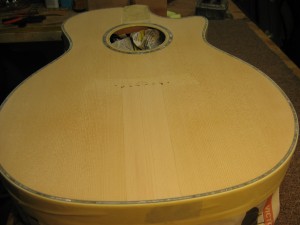
Touching up the patch alone and getting it to look right would have been nearly impossible, so we stripped the finish from the entire top, …
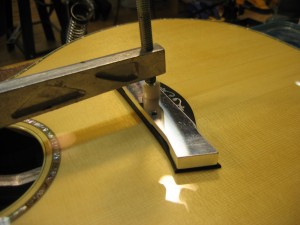
…then refinished the top, reglued the bridge, and reassembled the guitar.
Beautiful. Compare this repair to the previous one. It’s more stable, much better looking, and much better sounding.
*******
The Moral of the Story: Top cracks like these on an acoustic guitar, are usually a direct result of the wood drying out. This guitar wasn’t dropped or mishandled; it simply was exposed to the extra dry air that we find in Chicago when the weather gets cooler and the furnace comes on. Dried guitars also see problems with loose frets, bridges, braces, and even necks. We recommend that you store your guitar in it’s case year round – not on a wall hook or stand – and that when your furnace is on you keep a damp humidifier inside the case as well. It’s a cheap and easy way to protect your guitar from the changing weather conditions in our city.

My son has an acoustic that is 2 years old, 900$ new. 3 cracks, 8″ face 12″ back and neck seperated. Worth fixing? I’d love to bring it in to you guys.
Let me know TX
Bill, from what you tell me, I suspect the repairs would cost you quite a bit less than replacing that guitar. Even if the costs were close, we feel that repairing a guitar is better than throwing it away or otherwise putting it out to pasture. A $900 guitar is almost certainly worth the effort. So sure, bring it in for a closer look or give us a call!
Hello, just doing some browsing for my Dremel site. Lots of information out there. Wasn’t exactly what I was looking for, but nice site. Have a nice day.
Hello, great job on that Taylor 914. Very impressive. I’m too finding my self in a very similar situation with one of my guitars, 1987 Martin D28. I’m removing the finish from the top, I wanted to ask you what technique did you guys use to strip the finish from the Taylor, from the photo I can tell you its one hell of a good job. Thank You.
Thanks Didier. After removing the bridge and inlaying the new spruce piece, we used a palm sander to strip the old finish.
I have a limited ed. ovation that has a few cracks on the body similar to the post above [4 top cracks (2 like the taylor you fixed and 2 a little bit to the side of the bridge)]. The retail cost was 2900 how much would it cost to fix it? The body made out of Adirondack Spruce.
I have a custom made acoustic about 12 years old. It has two cracks in the top. The cracks appear to be surface cracks. How do I prevent them from getting worse?
Dave,
If you’re in the Chicago area or a similar climate (weather ranging from hot/humid summers to cold/dry winters, then I would recommend humidifying your guitar as part of your normal maintenance. Here’s a blog post I wrote last fall on this subject:
https://www.chicagofretworks.com/2012/10/23/guitar-humidifier-season-is-here-2012/#more-1819
Hi, I have a Taylor 510 with a crack-repair-gone-wrong on the top, resulting in a poor-sounding guitar with an unsightly bruise near the edge of the lower bout. I’d like to know if a repair like the one on this Taylor 914 is as expensive as a total new top, because the repair looks very much like what I think my guitar needs.
Roger,
Sorry to just be seeing your comment/question. You can also email us at info@chicagofretworks.com. If you’d like to send us some photos there I’ll put together an estimate for you. I’d wager that a repair will be far less than a new top. -Steve
What was the charge for the repairs to the Taylor guitar with the topside cracks? Not too specific just the total. I have a guitar I intend to send you either way just curious what to budget. Thanks in advance.
Mike,
It’s been long enough that I don’t recall what this repair cost exactly. But we price each job individually anyway so I’d recommend emailing some photos of your guitar and its affected area(s) to info@chicagofretworks.com. We’ll write back as promptly as we can with a detailed estimate. You can also call the shop or send the guitar in. We’ll send you an estimate/work order to approve before beginning any work regardless. Thanks for getting in touch!
Hi
I made the exact same mistake as the original repairer of this guitar when repairing a guitar of my own. I realised the error and searched the web and your site popped up. I’m now going to follow your instructions to rectify my mistake. Thanks very much for this very clear info.
Rob,
Best of luck with this repair!
I have a 1986 Taylor 12 string and the pick guard began to raise on the edges and became very noticeable. Against all warnings I removed the guard. It was coming beautifully until I lifted up before the glue was pliable enough to turn loose and I heard a crack that made me sick. I peeled out a thin top layer of spruce. Unfortunately Taylor no longer supports the larger guards like came on the guitar. I will deal with that but what can I do to repair that area under the guard so it will be flat and strong enough to hold a new guard? I’ve heard superglue and fingernail polish.
Tony,
I wouldn’t recommend superglue or fingernail polish. Both can create bigger problems than you’ve already got. If you’ll email me a photo of what you’ve got, I’ll tell you how we’d go about fixing it. info@chicagofretworks.com We do hand-cut acoustic pickguards here for just this kind of situation so it’s possible for us to get your guitar looking just the way it used to.
One month old new Taylor 614 . Has never stayed in tune. I see 2 cracks from bridge to base. They were not there a week ago. Should Taylor replace this guitar? These cracks would not happen in one month. I keep it in it’s case and have only played it a dozen times.
David,
I’m sorry to hear about your Taylor. You’ll want to bring it to an authorized warranty center like ours. The shop will answer some questions from Taylor to determine whether it’s a warranty repair or replacement situation. Unfortunately cracks can happen quite quickly if a guitar gets dry. There should be some pamphlets inside the case from Taylor; one titled “Symptoms Of A Dry Guitar” may provide some insight as to whether that’s what happened to your guitar but ultimately it will need an in-person inspection by an authorized shop.